
USB
You can use the USB port to connect the camera with integrated microphone. The camera and microphone are considered separately here. To use the camera functions, you must first configure them in the camera configurator. This section explains how to access the camera configurator.
Camera

The camera can be used, in particular, as a motion detector, a color detector, a ball detector, and a line detector.
Motion detector
To use the camera as a motion detector, you must drag the little man symbol into the screened area in the camera configurator; then, a window will open at the right side where you can define, under inspector
- the pixel area that will be checked for movement,
- the position of this area (the top left corner of the area is at the point indicated),
- the name of the motion detector, and
- the tolerance
Motion detector program
The motion detector program runs when a motion is detected. It is written separately from the main program. Variables work globally across both programs. The input program runs in the block when motion detected.
Color detector
To use the camera as a color detector, you must drag the pipette symbol into the screened area in the camera configurator; then, a window will open at the right side where you can define, under inspector
- the pixel area that will be checked for colors,
- the position of this area (the top left corner of the area is at the point indicated),
- the name of the color detector, and
- the contrast
Call
You can use get color as [] to obtain the detected colors in a hexadecimal or RGB format. You can set the format using the drop down menu (small triangle).
Query
To query whether the detector detects a color, use the is color detected block. This block can be used as a condition.
To query whether the counter has detected a certain color, use this
![]()
the drill hole. You can use the block to compare the detected color with the one that was entered. You can use the drop down menu (small triangle) to select whether the set color should be the same as or different from the filmed color. This block can be used as a condition. In the example, the motor is stopped when the color detected is red.

Color detector program
The color detector program runs when a color is detected. It is written separately from the main program. Variables work globally across both programs. The input program runs in the block if color detected.
Ball detector
To use the camera as a ball detector, you must drag the Ball symbol into the screened area in the camera configurator; then, a window will open at the right side where you can define, under inspector
- the pixel area that will be checked for balls,
- the position of this area (the top left corner of the area is at the point indicated),
- the name of the ball detector,
- the range in which the diameter of the balls is located,
- the range of the x axis,
- the color of the ball, and
- the color tolerance
Call
Use get [] ball to obtain the x position, y position, radius or diameter of the ball.
Query
To query whether the detector detects a ball, use the if ball detected block. This block can be used as a condition.
To query whether the detector detects a ball with a certain x position, y position, radius, or diameter, use this
![]()
the drill hole. You can use the block to compare the specifications for the detected ball with an entered value. You can use the drop down menu (small triangle) to select what should be compared, and with what comparative operator. This block can be used as a condition. In the example, the motor is stopped when the diameter of the detected ball is 5.

Ball detector program
The ball detector program runs when a color is detected. It is written separately from the main program. Variables work globally across both programs. The input program runs in the block if ball detected.
Line detector
To use the camera as a line detector, you must drag the symbol with the dots on a line into the screened area in the camera configurator; then, a window will open at the right side where you can define, under inspector
- the pixel area that will be checked for lines,
- the position of this area (the top left corner of the area is at the point indicated),
- the name of the line detector,
- the number of lines to be detected, and
- the range in which the width of the line(s) lies
Call
Use get [] the line [] to obtain the position or width of one of a maximum of five lines.
Use get color of the line [] as [] to obtain the color of a line output in hexadecimal or RGB format. You can set the format using the drop down menu (small triangle).
Query
To query whether the detector detects a line, use the if line detected block. This block can be used as a condition.
To query whether the detector detects a line with a certain position or width use this
![]()
the drill hole. You can use the block to compare the specifications for the detected line(s) with an entered value. You can use the drop down menu (small triangle) to select what should be compared, and with what comparative operator. This block can be used as a condition. In the example, the motor is stopped when the width of the detected line is less than 2.

To query whether the detector detects a line with a certain color, use this
![]()
the drill hole. You can use the block to compare the detected line color with the one that was entered. You can use the drop down menu (small triangle) to select whether the set color should be the same as or different from the filmed color. This block can be used as a condition.
Line detector program
The line detector program runs when one or more lines have been detected. It is written separately from the main program. Variables work globally across both programs. The input program runs in the block if line detected.
Microphone
The microphone integrated in the camera can be used as a volume detector.
The Start each time block
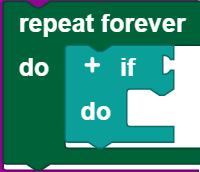
The Start each time block offers the option of running a program when a condition is fulfilled. Therefore, it works similar to a case distinction, but runs not only one time, but rather every time the condition is fulfilled during the entire course of the program. The Start each time block:

Is an abbreviation for the following construct:
You can insert all conditions from this category into the microphone category in the Start each time block.
Note: The program section in the Start each time block should be kept short, and should not contain any blocking calls or endless loops, so that this part of the program can be processed quickly.
Volume detector
Call
Microphone volume provides the volume in decibels.
Query
To query whether the volume detector detects a certain volume level, use this
![]()
the drill hole. You can use the block to compare the detected volume with the one that was entered. You can use the drop down Menu (small triangle) to select what comparative operator should be used for the comparison. This block can be used as a condition.