
General use
ROBO Pro Coding is a development environment used to program the new TXT 4.0 Controller, and for programming fischertechnik models. ROBO Pro Coding is available for Windows, macOS, Linux, iOS, and Android, and can be obtained from these sources.
![]()
![]()
![]()

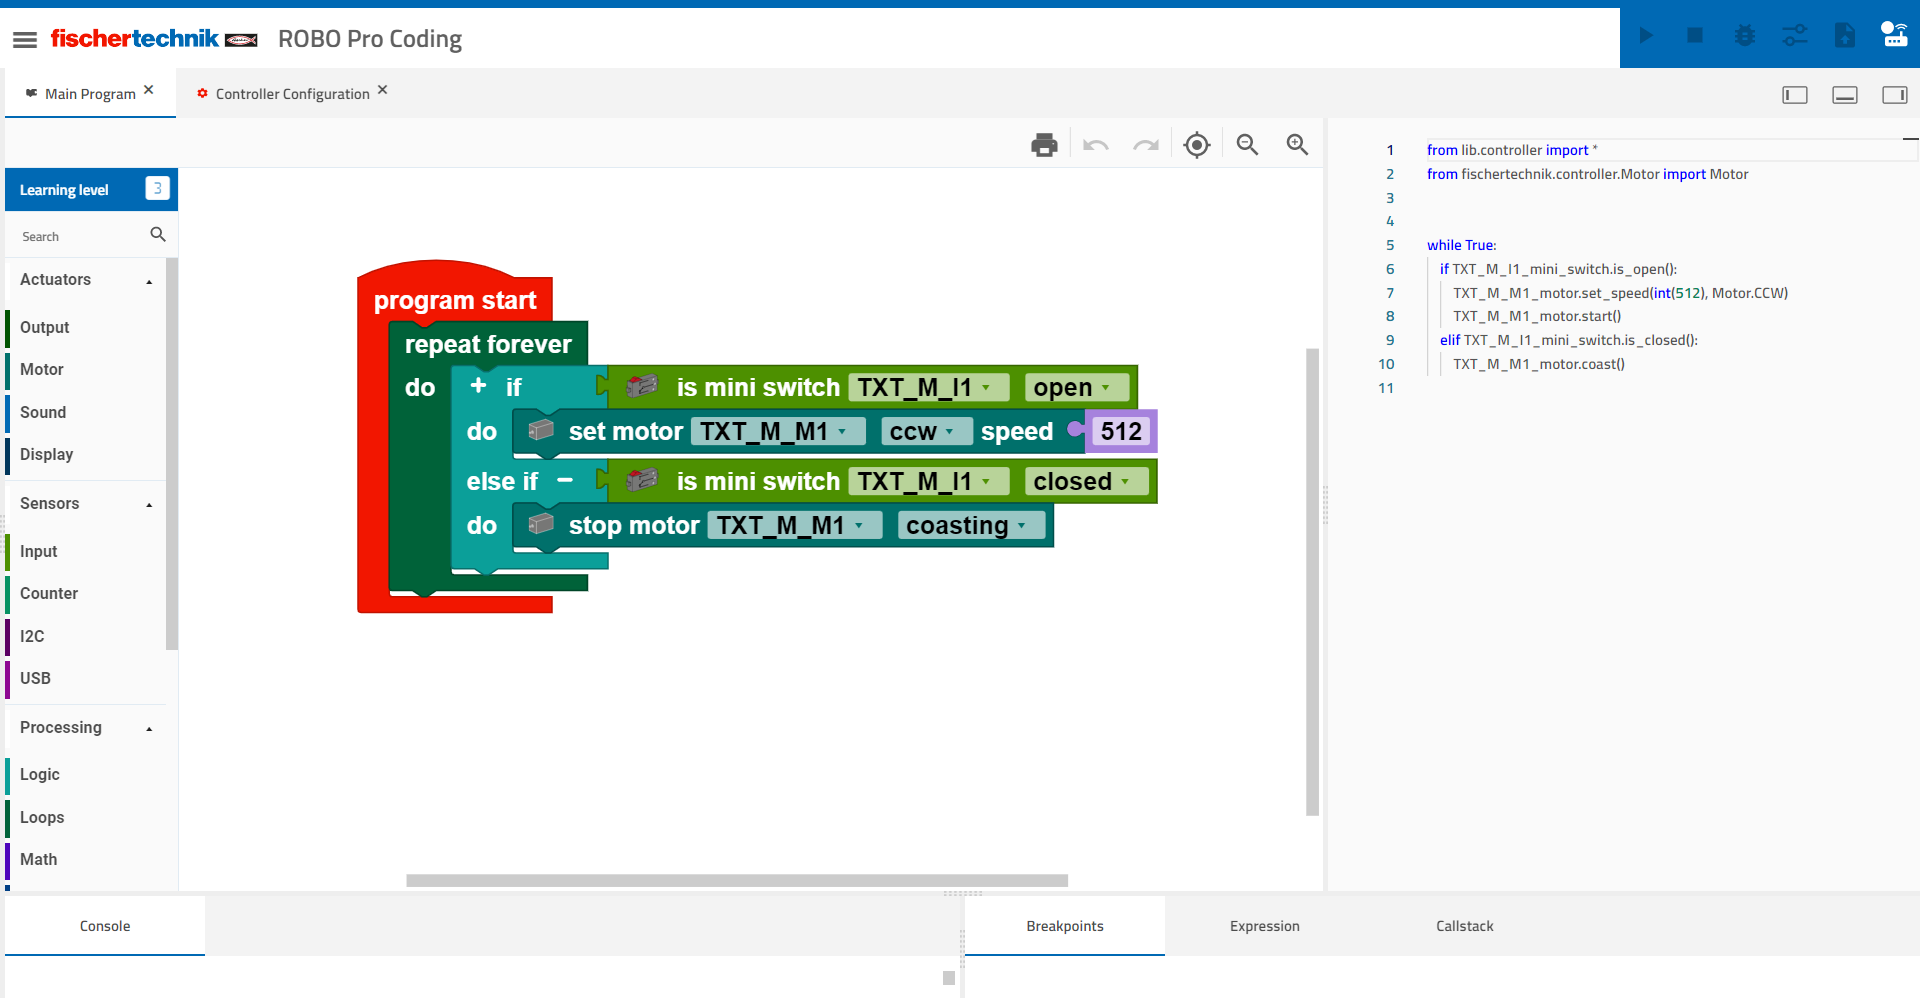
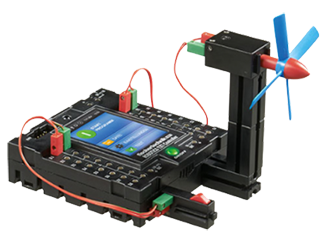
The code shown could be used for this model (left).The web interface of ROBO Pro Coding is structured as follows (the numbers refer to the areas designated in the image):
- This section shows what was programmed in blocks in Python
- This is the field to which the blocks are dragged to program them
- The program process is documented in the console
- Breakpoints are used to debug programs. They define certain points in the code at which the program is stopped. These are set using the Editor, and consist of the file name + line number.
- You can view variable content under Expression.
- The Callstack shows the nesting of calls. This is helpful in particular when using functions.
- This section includes all blocks for programming, sorted into the categories of actuators, sensors and processing
- This line is explained separately under header
- You can adjust the learning level to the user here. Depending on the level, for instance, only the most important blocks are displayed.
Header
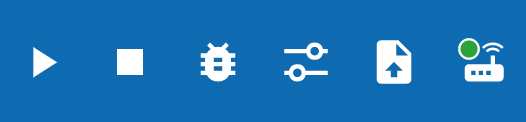
The header contains (from left to right) the operating elements for starting the program, stopping the program, starting the debugger, accessing the interface test, uploading the current program, and connecting to the Controller.
Starting programs
To start your program from ROBO Pro Coding, click this symbol.
Stopping programs
To stop your program before it ends independently, touch this symbol.
The debugger
The debugger is designed to make it easier to find errors in a program. You can use the menu at the top right corner to go through the code step by step, thereby simulating a program run. The program will nevertheless react to interactions with sensors, such as pushing a button. While running through the program, you can see which block you are in at the left side in the large field, as well as what point in the Python code you are at on the right side.
The interface test
When you click this symbol with the three sliders, this window will open:
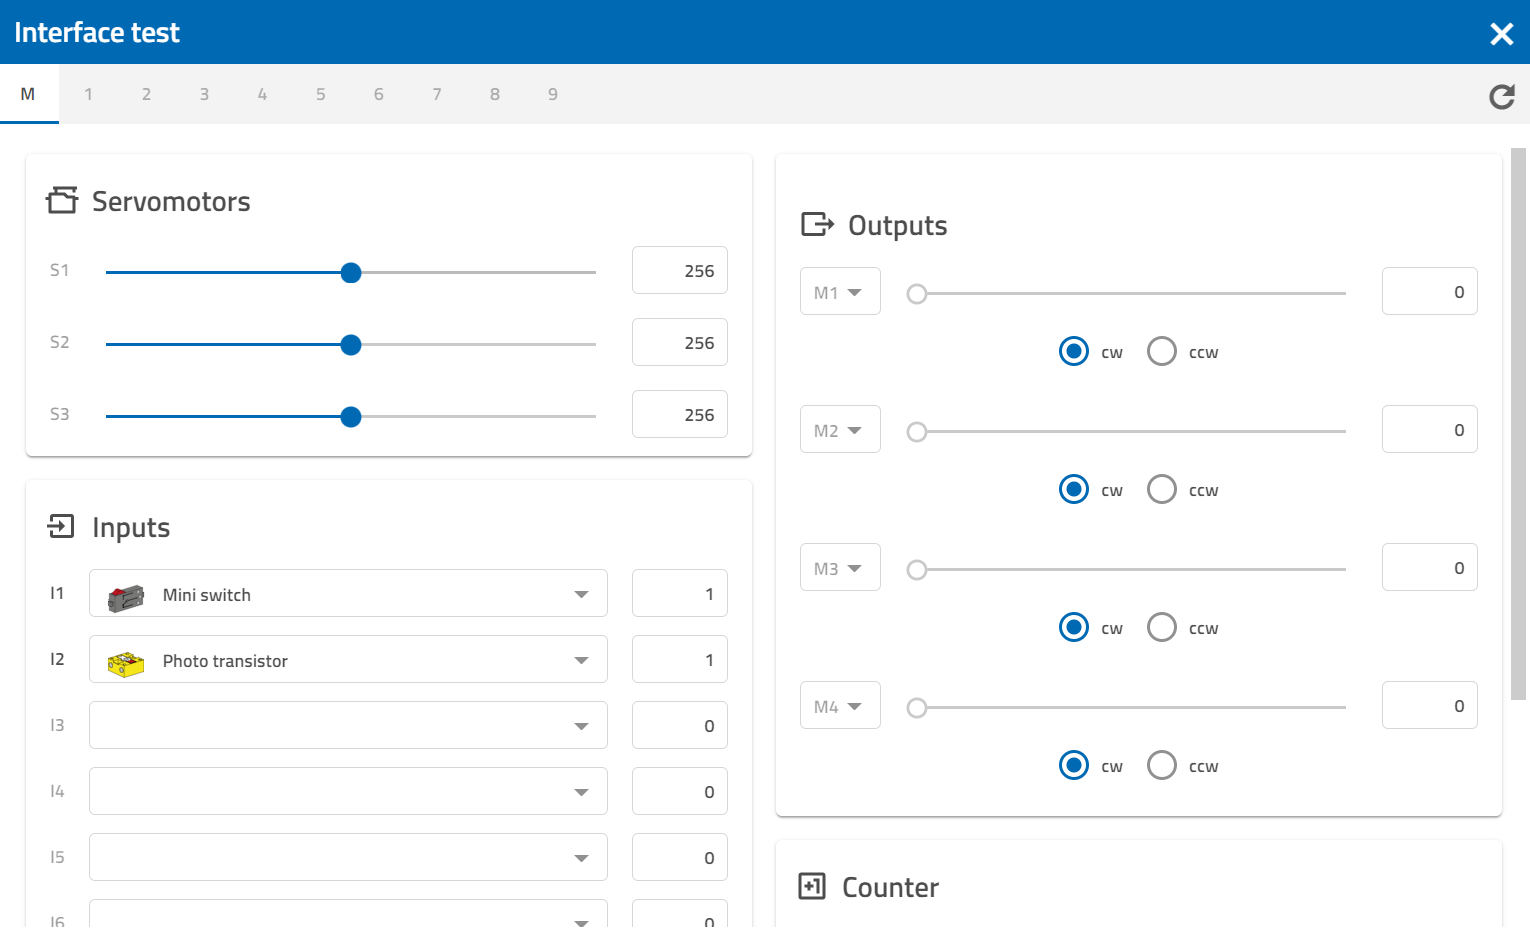
You can view all connected devices here. Under actuators, you can use the sliders to check whether they are working. The measured values are indicated for the sensors (there is a 1 by the button, for instance, because it is pressed). You can use the drop down menu (small triangle) to indicate what is connected.
Uploading programs
If you have written a program and want it to run autonomously on the Controller, you can load it to the Controller using this symbol. It will then appear as one of the files on the Controller. Touch the program name there to access the sub-folder for the program. There is a file here named “main.py.” Click this file, and the “Open” button at the bottom right should be illuminated green. If you press the “Open” button, another menu will open with four options:
- Load: Load the program, then you can start it from the home screen
- Auto load: The program will be re-loaded automatically the next time you start the Controller
- Auto start: The program will be re-loaded automatically the next time you start the Controller and started directly
- Delete project: The program will be deleted from the Controller
Connecting to the Controller
This section explains how to connect to the Controller.
Controller configuration
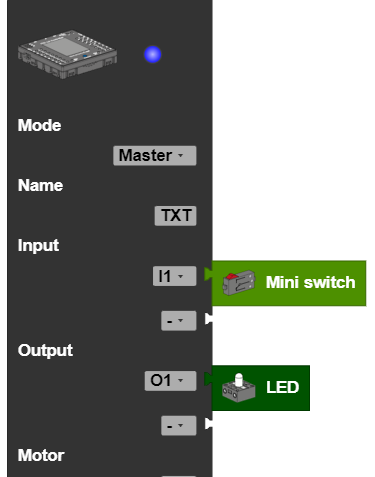
To use components such as sensors and actuators in the program, you must connect them to the Controller, not only physically, but in the software as well. The Controller configuration is always opened automatically, and can be accessed at the top directly beside the main program.
Now, the Controller and all available components that can be connected to the Controller are displayed in the left area. Drag the Controller to the programming area. Then, you can connect the desired components to the Controller via drag and drop.
Saving programs
If you would like to save a program, click the three lines at the top left of the ROBO Pro Coding website. Touch the “Export” option here. Now, you can select whether you would like to save your program locally on your device or on GitLab.
Local: After you have entered the name of the program, simply click “Export” and the program file will be on your device.
GitLab: After you have entered the name of your program and followed the steps indicated to enter your personal access token, simply click “Export” and the program file will be saved in your GitLab account.